Project REO Speedwagon

Steve Frazier

Founder
Staff member
It's going well. I'll post some more pics here in a few days, I have to transfer them from my phone to the laptop. My machinist has found some new old stock bearings and even found the transmission bearings I've been looking for for several months. Pistons have to be custom made. This truck is coming apart pretty well, I've only broken 5 bolts so far that were froze. I wasn't able to get heat on those that did due to location but I was able to extract them without trouble. Pretty pleased with that considering the age of the truck.

I've started stripping the parts truck so I can scrap the frame and body to make room in the shop. Got the motor out and cut the U bolts to the front axle. I had some concern that the truck had been submerged in a pond with the amount of rust on it, plus there was mud on top of the bell housing and even in the air cleaner. Transmission had more water in it than oil so I don't know what shape it's in internally but there wasn't a drop of water in the engine oil pan. Engine is stuck so I pulled the head, I think it's stuck because it's been sitting so long. The cylinders have a rust film on them but no bad pits. Hopefully I can sell it, my machinist said these genuine REO engines are a bit of a rarity, I'm hoping that means it has some value.

Made a trip to South Dakota a couple weekends ago to pick up a '69 Chevy C/20 I found on an auction to restore. I'm going to stay focused on the REO unless something stalls my progress, but I'm planning a restomod for the Chevy. Loved the grill on that truck growing up and got this one at the right price, there's very little rust and it's straight and complete!
 

Steve Frazier

Founder
Staff member
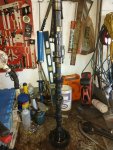
Camshaft, it's in good shape

Camshaft Edit.jpg


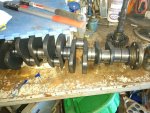
Crankshaft is huge, it's in good shape too even though the bearings are gunked up.


Crankshaft Edit.jpg


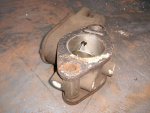
This appears to be a governor. It's between the carburetor and intake. I'm not sure how it works, there were no mechanical connections to the engine.


Governor Edit.jpg


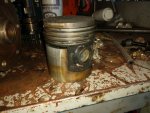
4 ring piston. New pistons are being custom made and will have 3 rings insytead
Piston Edit.jpg


Genuine REO engine
Piston bottom Edit.jpg
 

Steve Frazier

Founder
Staff member
I got sidetracked with a few other projects and have been away from the truck for a while. I spent quite a bit of time stripping parts from the spare truck, the skeleton is ready to be scrapped. I saved the engine, transmission, front and rear axles, steering box and anything else mechanical that might be of value. The sheetmetal and frame are rusted beyond repair.

I've run into a couple snags. I need to remove the horn button from the steering wheel to replace the horn wire but am having trouble. I sacrificed the button from the parts truck to try and learn how it comes apart, The horn button appears to be Bakelite, a very brittle plastic. There are slots formed on the underside that would indicate the button should come loose if it's rotated counter clockwise, but I just can't seem to get it to move. I don't want to break this one and will have to at some point replace that wire.

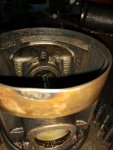
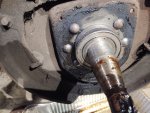
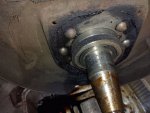
The other item is the front hub seal. I still have to look closer but at first glance this seal is configured differently than any other I've seen. It would appear that a ring with the sealing surface is pressed onto the spindle and there is a flat rub surface of either leather or rubber. There is a metal ring pressed into the hub that provides the smooth surface for the sealing material to rub on. I don't know where to begin looking for a seal number and have to be very careful with it until I do.

One other thing, the fuel tank is under the seat. I need to get the cushion loose to get it out and have it cleaned. There don't appear to be any bolts holding the seat in place, I'm guessing there are bling hasps of some sort.

If anyone knows of any tricks for any of these issues I'd sure appreciate hearing!!
 

Truck Shop

Well-known member
I can't help you with removing the seat, most horn buttons on old rigs required pushing down and rotating the button at the same time.
For the seal I would remove the wear ring from the spindle and remove the ring from the hub. Measure and find a modern seal to replace
with. It may even take some machine work to get it done. Post a photo of hub and spindle.
 

rzucker

Well-known member
That sounds like a common style of seal for farm tractor and backhoe front wheels. Now they use 3-4 ribs of rubber instead of the leather, pretty effective at keeping dirt out.
 

Steve Frazier

Founder
Staff member
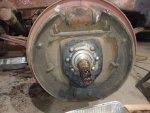
Here's the seal. I can't find any numbers on it and it looks like it should pull off the hub. The mating surface appears to be cut into the hub, I initially thought it was removable but I can't find a seam. I stuck a probe in the seal material and it's about a quarter inch thick. The brake shoes seem to be in pretty good shape but I'm going to have them relined as I don't know how old they are. I'm a little concerned about the pin pricking on the spindle, I'm going to measure and compare it to the other side. The bearings seem to be in goood shape and will just need repacked.Front Axle Seal B.jpgFront Axle Seal.jpgFront Brakes.jpg
 

Steve Frazier

Founder
Staff member
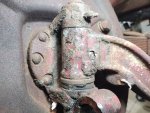
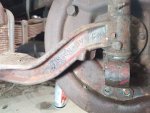
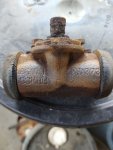
King pins need work, they're pretty sloppy. Timken, there's a 12 digit number cast on the other side I thought I had written down. A quick Google search didn't turn up anything, I thought that might help with the seals. There appears to be a dowel pin in the center of the kingpin that's peened in place. I'm hoping the pins and bushings are still available. Brake cylinder is by Wagner, the fluid is like pudding. I found a place I can send them out to to be rebuilt.Front Axle.jpgFront Axle B.jpgFront Brake Cylinder.jpg
 

Steve Frazier

Founder
Staff member
So far this thing has come apart like a new vehicle! I've had just one bolt break during disassembly and found two already broken that came out pretty easily after soaking with PB Blaster.
 

Steve Frazier

Founder
Staff member
Truck Shop, I've been attempting the procedure you described for the horn button, that's how it looks like it's supposed to work but it just isn't moving. It's in really good condition with emblem and all so I want to be careful with it. I wish you were closer to me!!
 

Truck Shop

Well-known member
Well If I was closer I would help you. You might just want to remove the ring in the hub and pack the bearings and reuse that seal, IDK.
I see the spindle has been staked with a punch to make the bearing fit tighter. Careful driving the swage pin out of the king pin boss.
You will probably need to heat the axle eye and use a tapered head black smith hammer and walk it up and down the axle eye to free
that pin up. Soak the hell out of it.
 

DMiller

Well-known member
That is as I can see a Leather style 'Packing Type' seal. will not be numbers, the steel ring to the bearing keeps it compressed by the race pressure. IF can find a way to remove that will most likely have to go to a leather goods handler to have them made.
 

Steve Frazier

Founder
Staff member
I'd like to upgrade to a modern type seal if possible. While I'm trying to keep it as original as I can I also want it to be worry free as much as possible. I'm sorry Mike, what does CR stand for?
 

Steve Frazier

Founder
Staff member
I finished stripping parts off the parts truck and am going to haul the remainder to the scrap yard. Most of what's left is rusted beyond any use.

I've got the front axle on the good truck out and stripped down, I'm trying to find someone within a reasonable distance that can rebuild the king pins for me, they're pretty sloppy.
 

DMiller

Well-known member
Comes a time to straighten up the mess!! Most any shop that does pins in heavy trucks should be able to handle that one.
 
Top